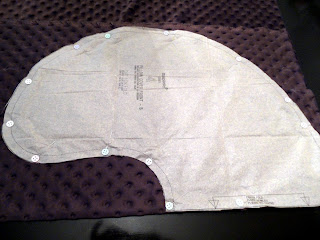
You have to admit, free is nice when purchasing a boppy cover can set you back about 30 bucks! Even when I make them for myself, if I take into account the cost of materials, I save myself money!
Lay out pattern onto your fabric!
Pin down to the fabric. I like to pin further into the pattern so I don't crash into them with my scissors!
Slip the pattern on the contrasting fabric!
This step is optional!! I like to get an idea of the curves so i pin then clip, then just wing it while I sew, my skills with piping aren't that great yet, although I have seen MUCH improvement.
Ahh yes...and this is what happens when you make a boo boo!
So I ran out of piping, and lo and behold for this project I ran out of the color I needed! But aside from that fact it is well hidden now and barely noticeable ;)
And believe me, I have learned my lesson!!! ALWAYS BUY EXTRA!!!
So some may choose the method of folding the piping into the seam, my preferred method is to go without that lump from the two ends crossing.
So in the picture above I measure about half an inch into each end. The light brown will be going into the dark brown piping.
So with my snips, I clip the seam of the dark brown piping at just about the
point I marked off for it.
Open up the seam, and expose the rope inside.
Next step is to cute the white rope at the point you marked your piping. Then take
the end of the fabric and fold it down to make the edge neater.
Here you will set the light brown end into the dark brown seam,
so that the white ropes from both ends are flush with each other.
Pin,
Sew,
and repeat for the other side.
Not so bad eh?


I was wondering since you sewed your boppy unlike the original one where there's the 3rd strip of fabric in the middle section where it connect both fabric will it still fit the original boppy?...
ReplyDeleteActually the original pillow has the strip, but the cover still fits as snugly as any other cover boppy makes, its all dependent on how start the pattern. As for fit, the original boppy is what I have and the proof is above where I put the covers on it :)
ReplyDeleteJenny - where did you get the pattern from?
ReplyDeleteJenny - where did you get the pattern from?
ReplyDeleteNice post. I was checking constantly this blog and I am impressed!
ReplyDeleteVery useful info specially the last part :) I care for such information a lot.
I was seeking this certain info for a very
long time. Thank you and best of luck.
My web site http://demo.socialengineexpress.com/blogs/24063/26800/some-good-suggested-exercises-th
wonderful post, very informative. I ponder why the opposite specialists of this sector don't understand this. You must proceed your writing. I'm sure, you have
ReplyDeletea huge readers' base already!
Also visit my web blog; vertical jump workouts
Peculiar article, totally what I wanted to find.
ReplyDeleteAlso visit my web blog - bestblogsbrasil.com.br
If you desire to take a good deal from this paragraph
ReplyDeletethen you have to apply these methods to your won webpage.
My website: http://Www.love2dating.com
Hey! Someone in my Facebook group shared this site with
ReplyDeleteus so I came to check it out. I'm definitely enjoying the information. I'm
book-marking and will be tweeting this to my
followers! Excellent blog and great design and style.
Look into my blog ... workouts for vertical leap
Howdy! This is my first comment here so I just
ReplyDeletewanted to give a quick shout out and say I genuinely enjoy reading your posts.
Can you recommend any other blogs/websites/forums that go over the same topics?
Thank you!
Look at my webpage; http://Putraputriantam.com/ClaytonAJ
Good post. I am dealing with many of these issues as
ReplyDeletewell..
Stop by my site; workouts to improve vertical leap
Great post however , I was wondering if you could write a litte more on this subject?
ReplyDeleteI'd be very thankful if you could elaborate a little bit more.
Thanks!
Here is my web page; buy permanent twitter followers